How to Build a BDSM Whip Rack

Making your own whip rack is not a huge project and can be done quite simply and cheaply with a few things from the DIY store.
Tools Needed:
Drill
Drill bits (5/32” and ¼”)
¼” Wood Screws
Screwdriver
Level
Yard ruler
Pencil
Sander or sand block
Lint free cloth
Tape measure
Paint brush
Materials Needed:
One Piece of 3 ply wood 48” x 48” x 1”
Two pieces of 48” 
Wall mount spring clips (1 for each whip/flogger/crop)
Wall anchors
Sandpaper (120 grit)
Paint or varnish
Step 1
Decide where you want to place your new whip rack and mark 48” for the piece of ply wood. Use the level to make sure it is placed correctly and mark 2 points 1 inch in from either corner. These will be your holes for the wall anchors.
Step 2
Sand the piece of ply wood and the two pieces of lumber until they are perfectly smooth.
Step 3
Mark the exact halfway point of the two pieces of lumber (24 inches) and mark the center of the pieces to find the exact point where the screw holes will be drilling.
Step 4
Mark the exact halfway point on the ply wood.
Step 5
Drill the holes in the wall and tap the wall anchors into place.
Step 6
Place one piece of lumber at the very top edge of the ply wood so that they edges are perfectly together. Drill a hole on either end exactly 1 inch in from the edge, going straight through both pieces.
Step 7
Drill a ¼” hole through the 24 inch half way mark and screw together to secure the lumber through the middle.
Step 8
Place the second piece of lumber along the bottom edge and use wood screws to secure.
Step 9
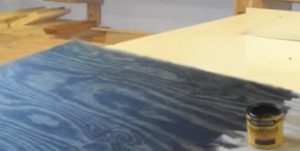
Wipe the wood down with a lint free cloth and varnish or paint in the color of your choice and allow to dry thoroughly.
Step 10
Secure the entire frame to the wall using the marks you make earlier.
Step 11
Decide on the positioning of your whips, floggers and crops and attach the mount clips to the piece of ply wood.
Step 12
Fit your whips, floggers and crops into your newly created mounting rack.
Your new rack will give added chic to your dungeon/playroom and look very impressive to your ‘victims’. Depending on the size of your whip, flogger and crop collection you can expand the size of the ply wood sheet to fit. You may be the proud owner of forty or fifty items, in which case, 48” x 48” is not going to be big enough. You can also separate each item into sections, so that you have one for your whips, one for your floggers and one for your crops.
Please feel free to reach out with any comments, questions or concerns you may have. Contact us now.